Network Address Validation
Network Address entries are validated by the portal’s Create/Edit Network modal and are displayed below the input field. IPv4 only allows CIDR ranges to be between /24 and /32, and DNS addresses must conform with the RFC standard.
Correct errors in order to save IPv4, CIDR, or DDNS entries.
Note: Because we accept DNS addresses, some invalid IP Addresses may make it pass validation because an invalid IP address can technically be a DNS address.
Option 1: IPv4 Address
Simply insert a standard IPv4 address in the field. In the event that there is more than one IP address used for a Customer site, then you will either need to create a new Network or do one of the other options below.
Option 2: IP with CIDR Notation
Classless Inter-Domain Routing (CIDR) allows for notation to specify a range of IP Addresses. They include two parts separated by a forward slash /:
-
The IP Address base
-
The CIDR range as an integer
The most important thing to note is the secondary field (CIDR Range) number decreases the number of IP Addresses in the range with a larger number designation.
For IPv4 a /0 designates 4,294,967,296 IP Addresses while a /32 designates just a single IP address.
Examples of the notation as well as the ranges for each integer distinction can be found at this site: IPv4 CIDR - IP.SB
Zorus Network Security only allows CIDR ranges for IPv4 to be between /24 and /32. DNS addresses must conform with the RFC standard.
The dashboard displays the IP with the CIDR instead of every IP address in the range, e.g. 45.66.23.0/24.
Option 3: Dynamic DNS Address
Small businesses or homes frequently do not buy expensive network hardware nor register for explicit static IP Addresses, so their networks are given a “dynamic” or “possibly changing” IP address from their Internet Service Provider (ISP).
Because ISPs can change the IP address at any time, using Dynamic DNS (DDNS) is the best option. DDNS clients periodically update what that device is resolving as its public global IP Address. This address is then bound through their system to a “DNS Address” that they have in their records that you register with them. Instead of providing a hard-set IP address, you instead provide this “DNS Address” that will resolve to where the DDNS client is pushing any IP address changes from.
The dashboard displays both the Dynamic DNS Address record and any resolved IP addresses separated by a colon, e.g. yourcustomerhostname@ddnsprovider.com: 47.196.174.92.
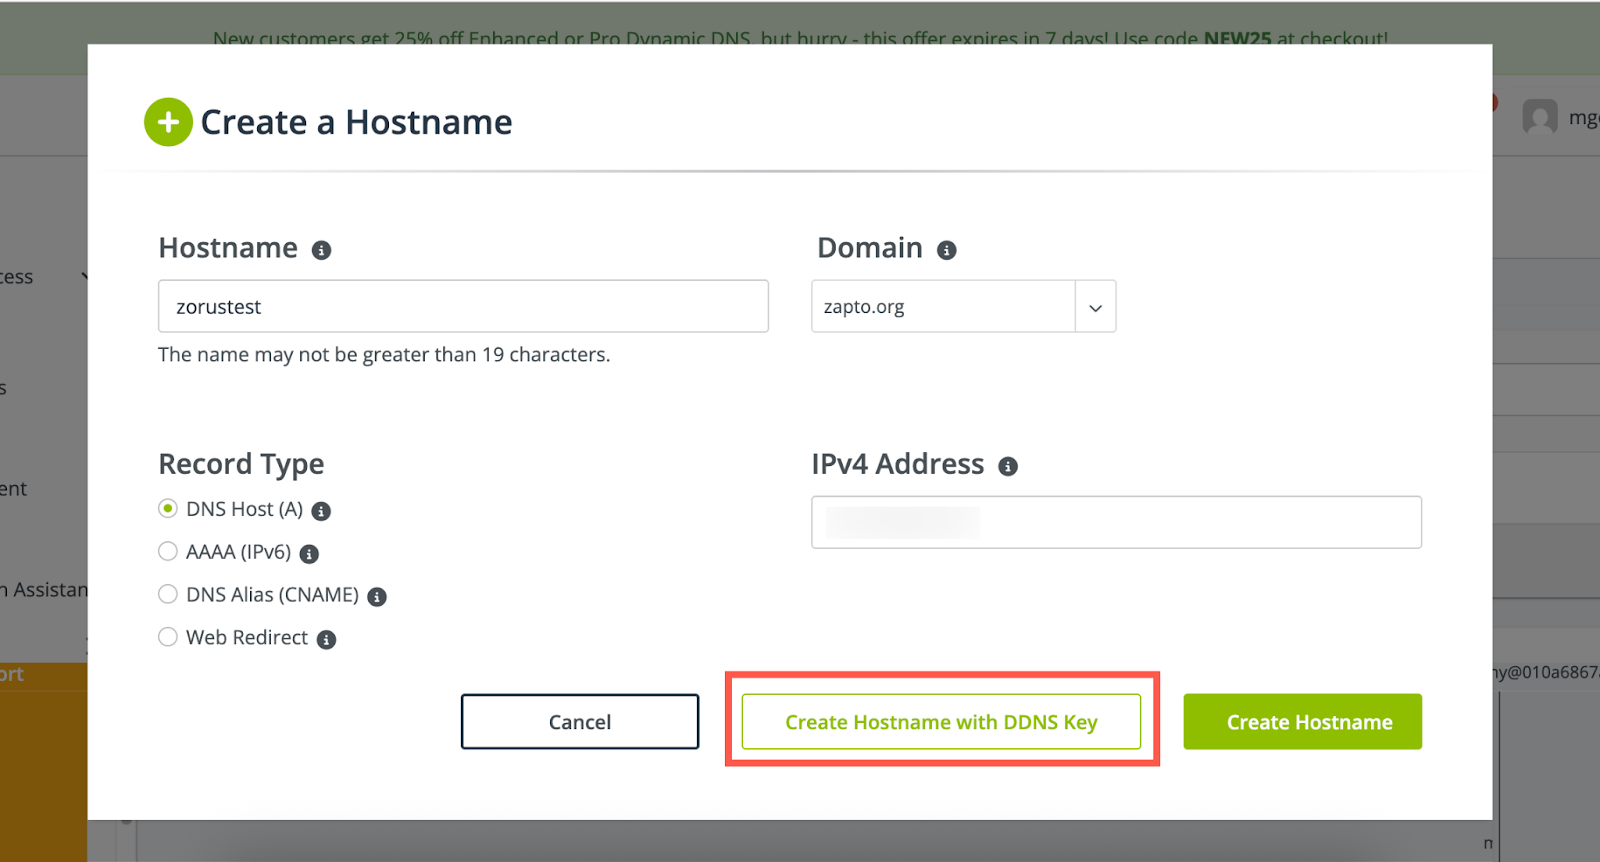
Example: How To Set Up Dynamic DNS Client with No-IP
No-IP offers a range of DDNS hostname options at little to no cost.
- Sign up for an account and create a No-IP Hostname with DDNS Key
- Install the Dynamic Update Client (DUC) following No-IP in-app instruction. The DUC runs in the background to update IP address information
- Enter your DDNS hostname in the ZNS Network Address field
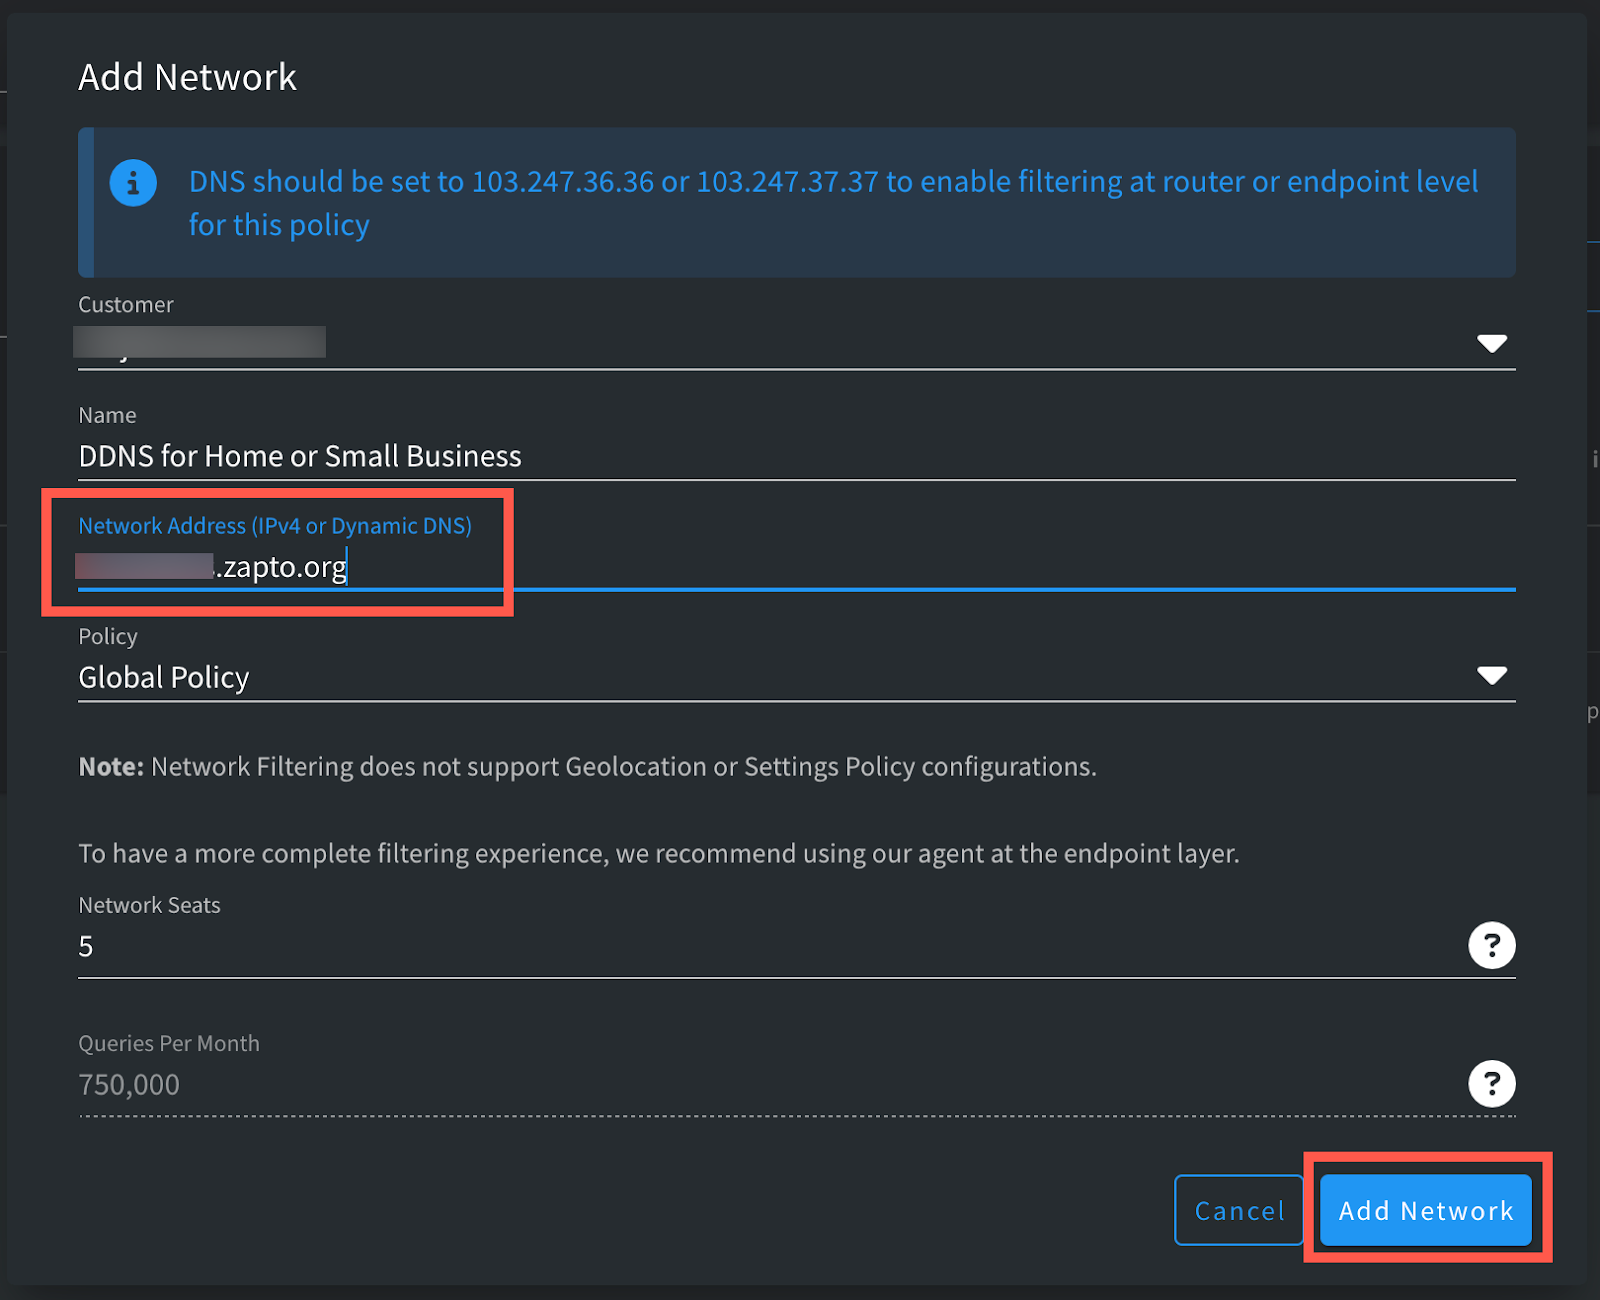
That’s it! DDNS is all set up 🙂