Our alerting system is very customizable. While it is possible to create alerts with extremely narrow parameters it is also possible to create alerts with extremely broad parameters. Creating alerts with very broad parameters will not only spam your inbox/portal notifications but are unlikely to provide you with useful information about the traffic. If, however, you really want to get an email every time someone performs a request in passive mode you can.
NOTE - due to the amount of "background" requests a single visit to google.com with "Search Engines & Portals" as the only required condition can result in hundreds of alerts.
In this guide, we will walk you through how to use the Custom Alerting feature in the Zorus Portal.
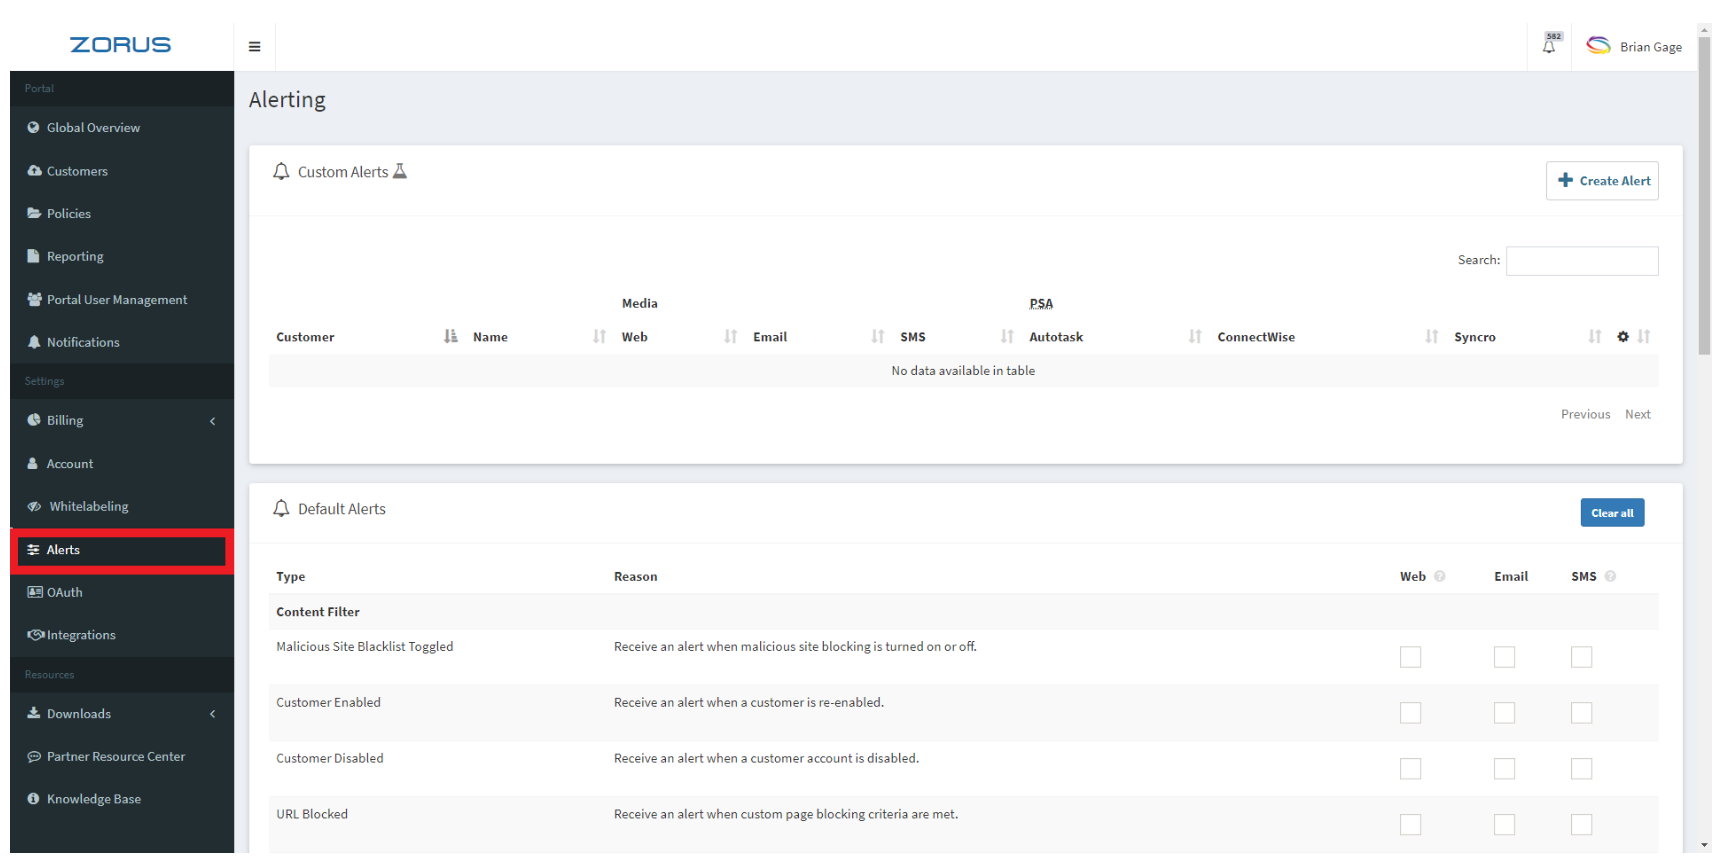
To start, you'll first want to navigate to the Alerts section of the Portal, located in the left sidebar.
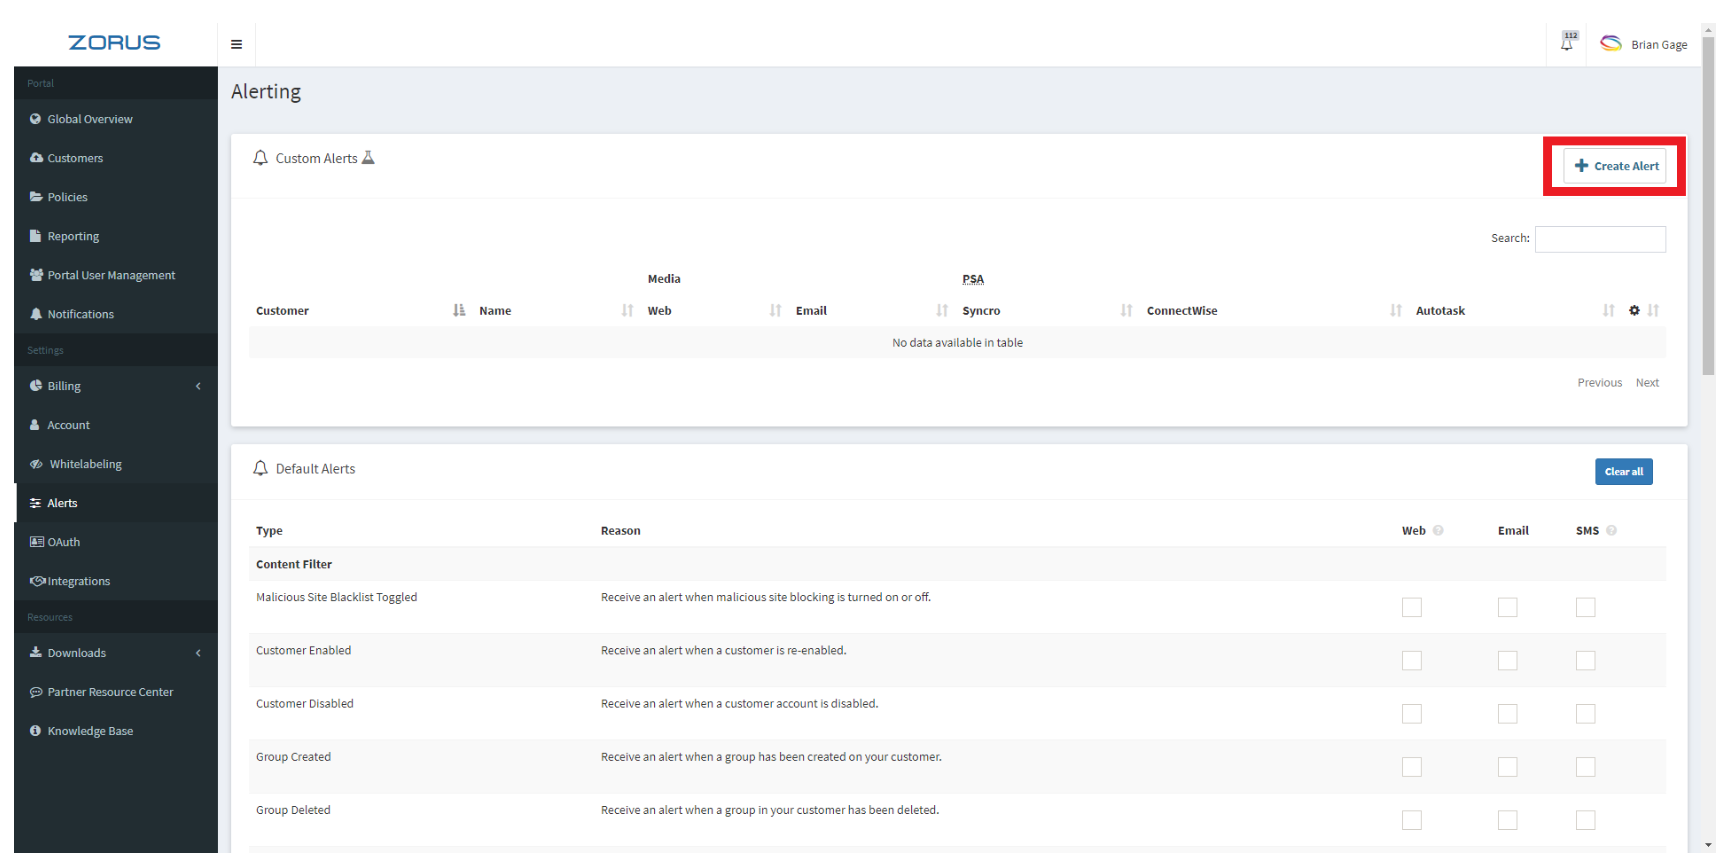
Once you're on the Alerts page, the next thing you'll want to do is click "Create Alert".
Next, we'll move on to how to create a custom alert using the Custom Alert wizard.
Step 1. First, you'll need to choose a name for your alert, write a description, and select the customer you wish to apply this alert to. We recommend being descriptive because the name and description will appear in the alert (an email and/or a portal alert).
Example Name: Group Sales Accessed Adult Content
After you do this, click Next to move on to the next step.

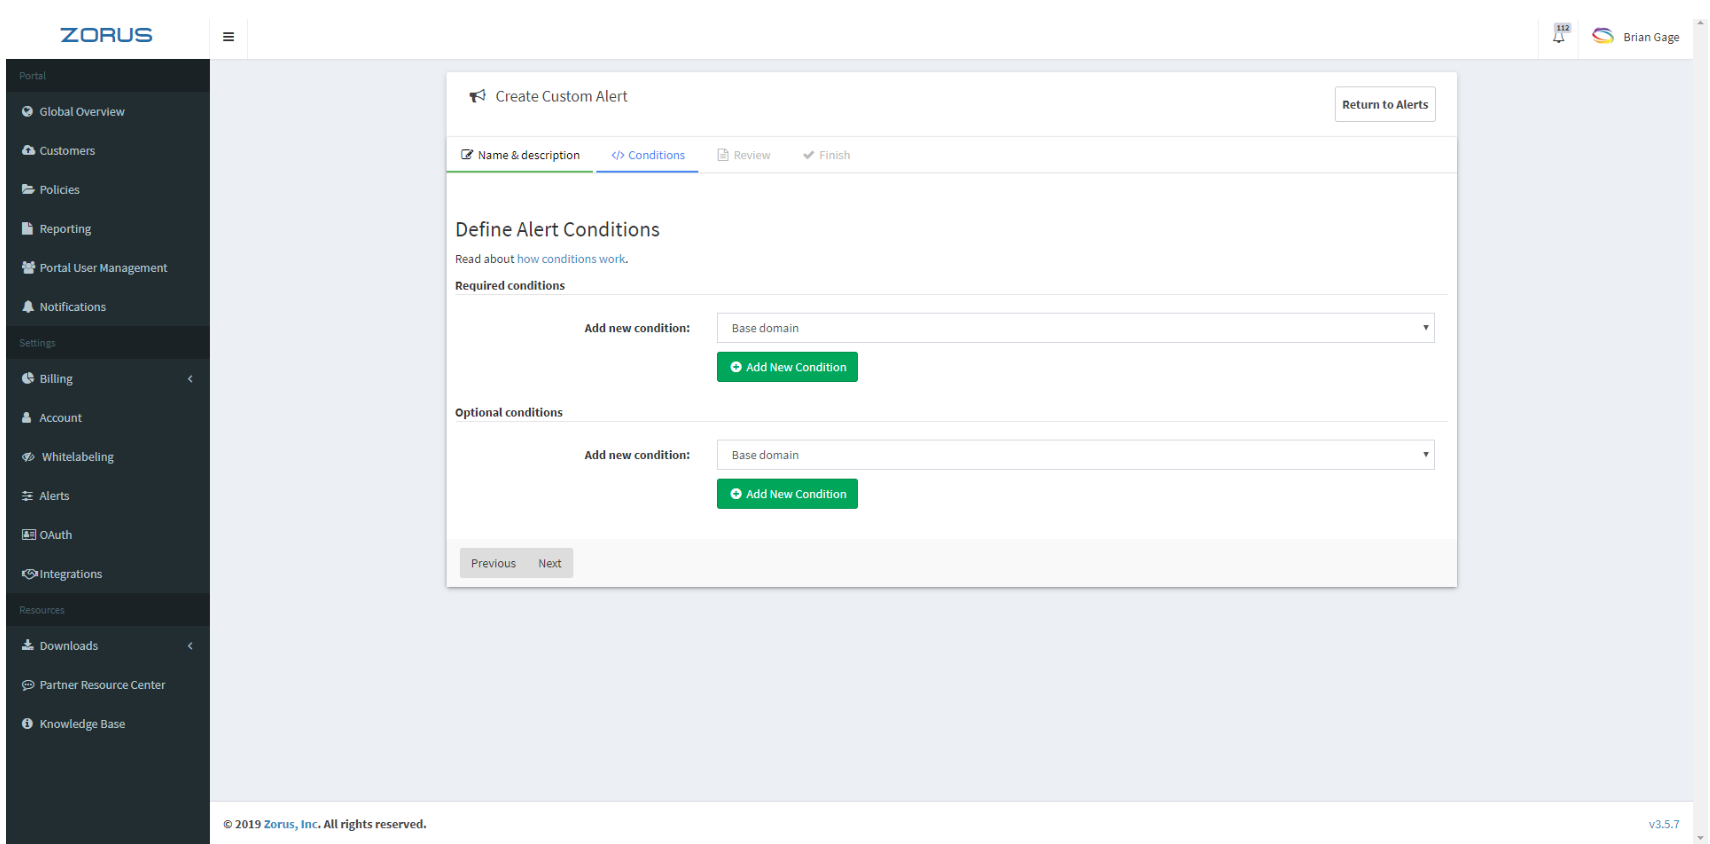
Step 2. Now you'll be adding conditions to the alert. Each alert must have at least one "required condition" however you can add as many as you'd like.
*Note* All required conditions must be met in order for the alert to trigger. Additionally, you can add as many optional conditions as you'd like. If optional conditions are added, all required conditions and at least one optional condition must be met in order for the alert to trigger.
Examples
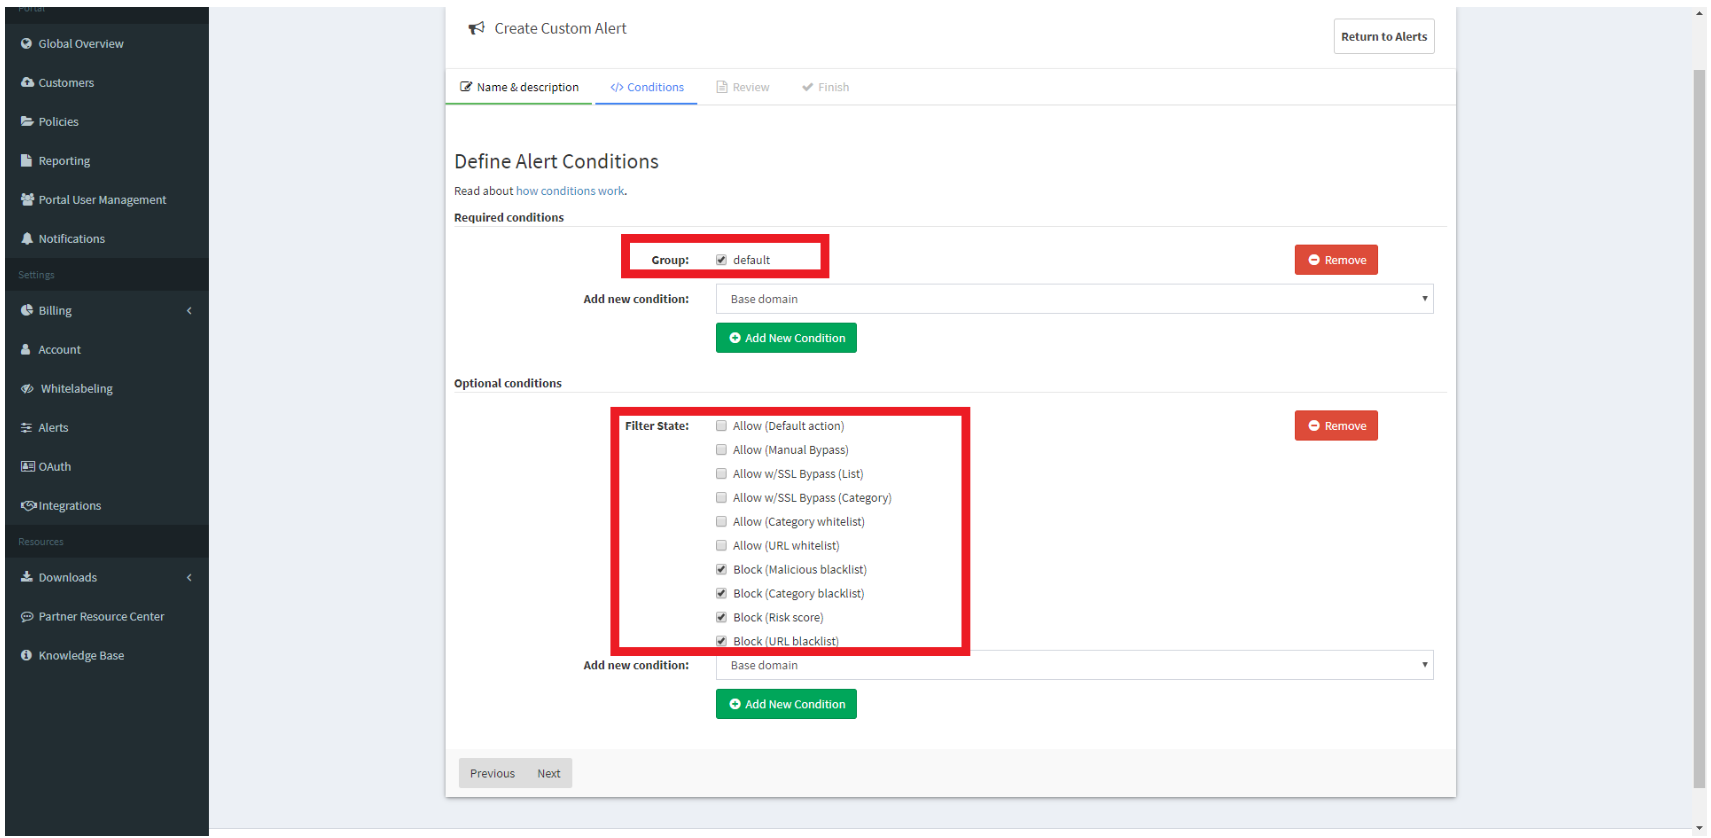
Do Example Add a Group(s) as a required condition and Filter State as an optional condition with all Block states selected. This alert will trigger on any block for the group selected (name of the group).
*Note* This alert might trigger more often than you'd like.
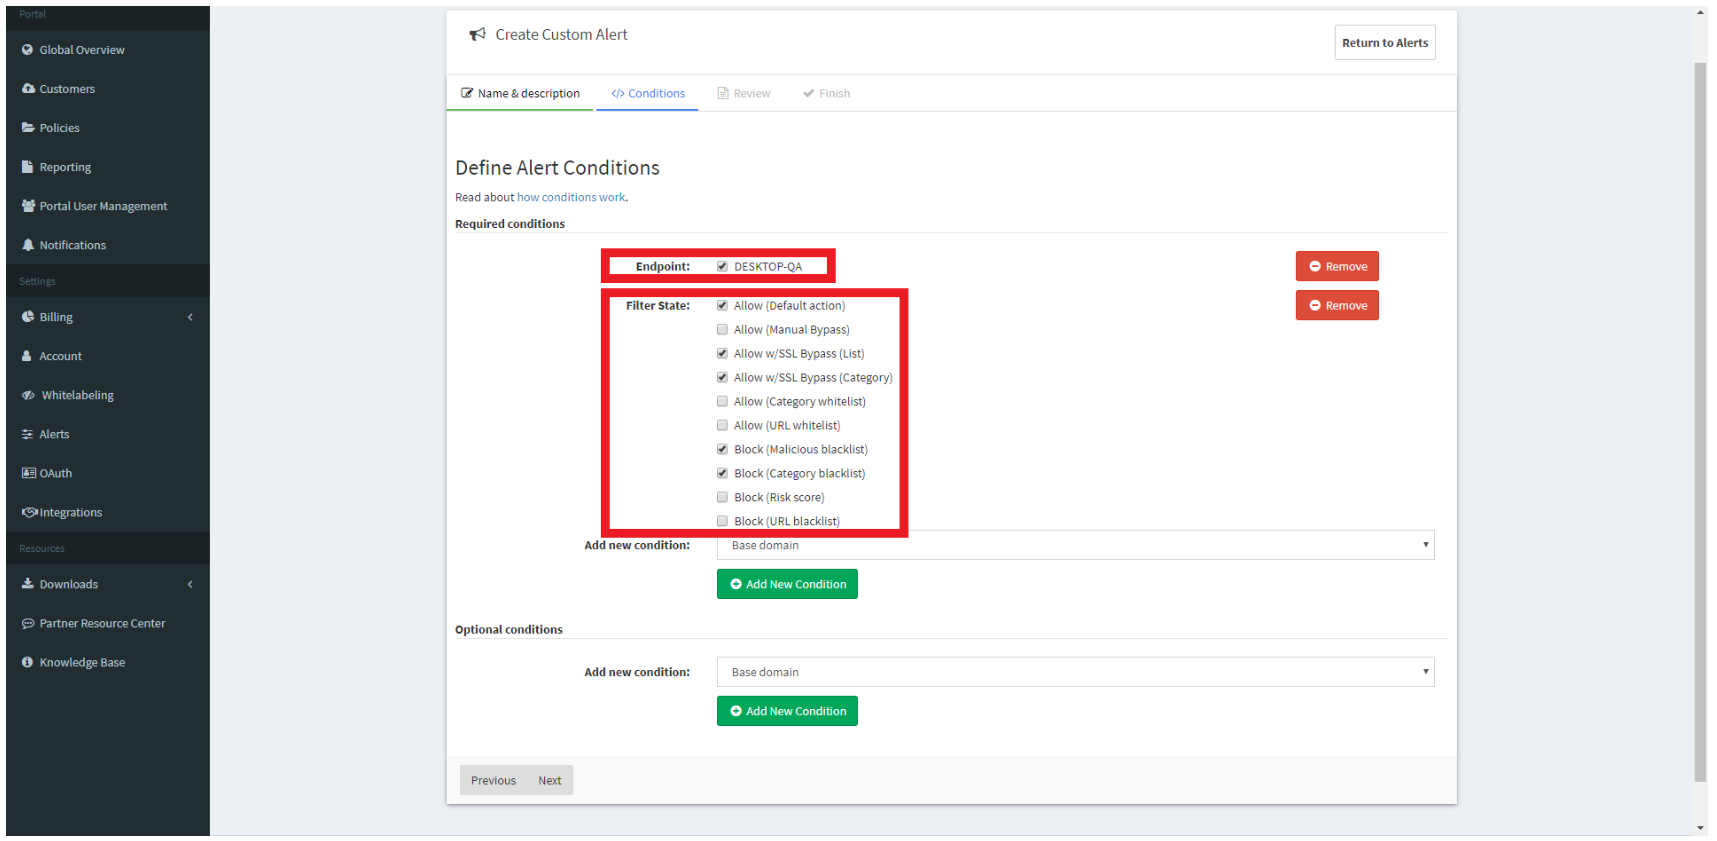
Don't Example Creating an alert with an Endpoint selected as a required condition, as well as a required condition with multiple Filter States, selected.
This might seem correct but since each required condition must be met this alert will never trigger. If you want to check for all of these filter states, make this an optional condition.
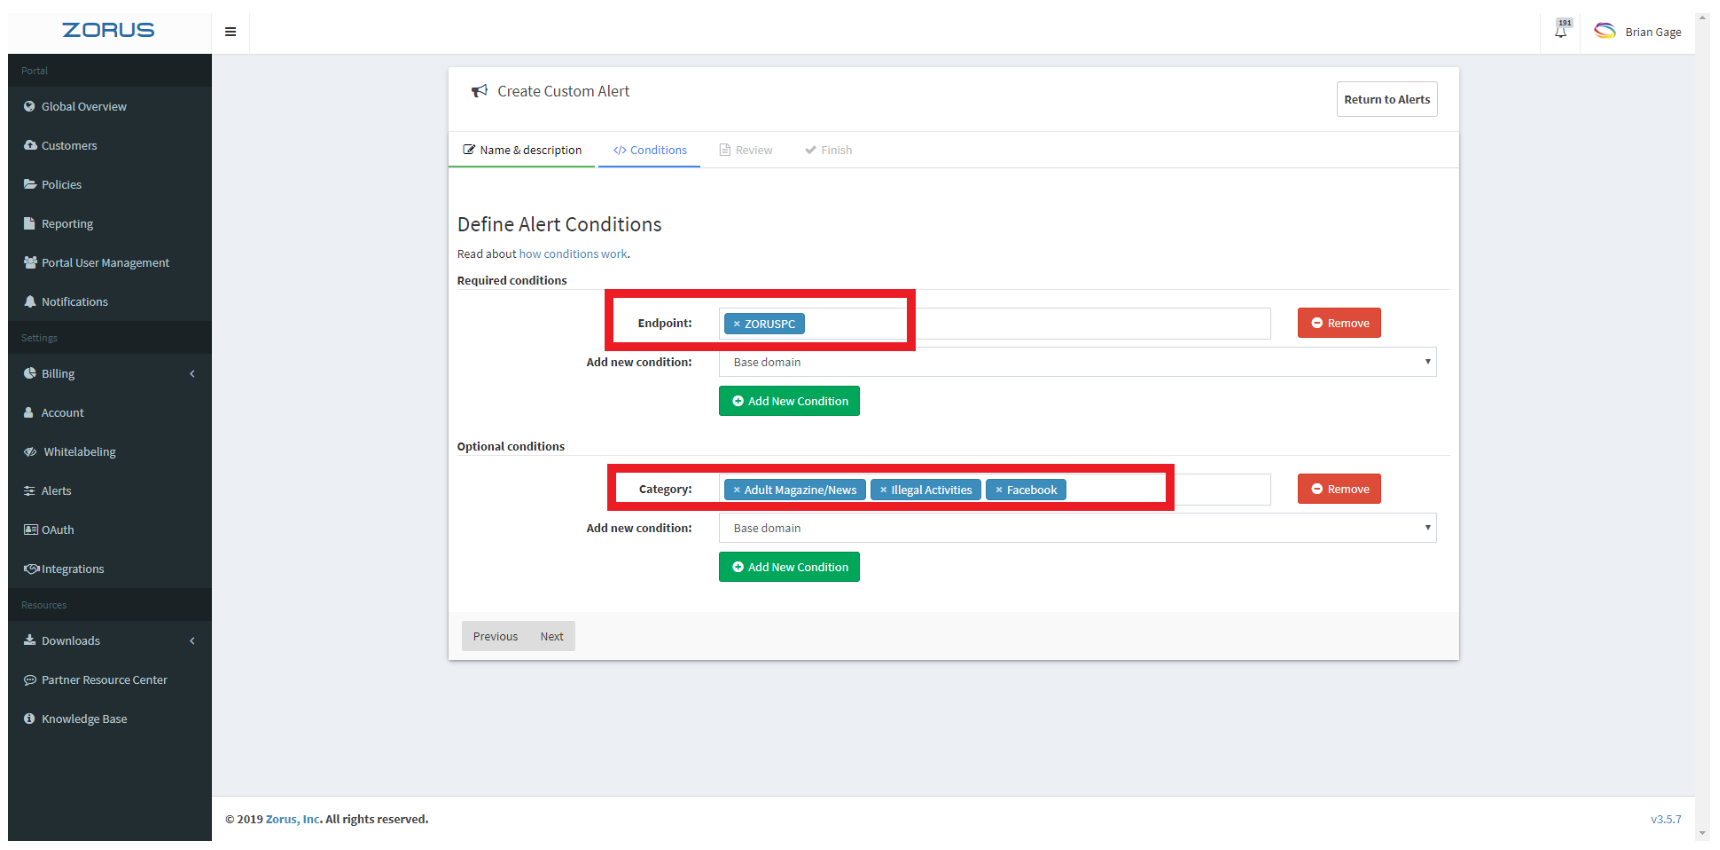
Do Example: Add an Endpoint(s) as a required condition and then select Categories you wish to be alerted about as an optional condition.
This alert will trigger any time this specific endpoint(s) accesses websites under the selected categories. This will show any time a request for one of those categories is made whether or not it's blocked.
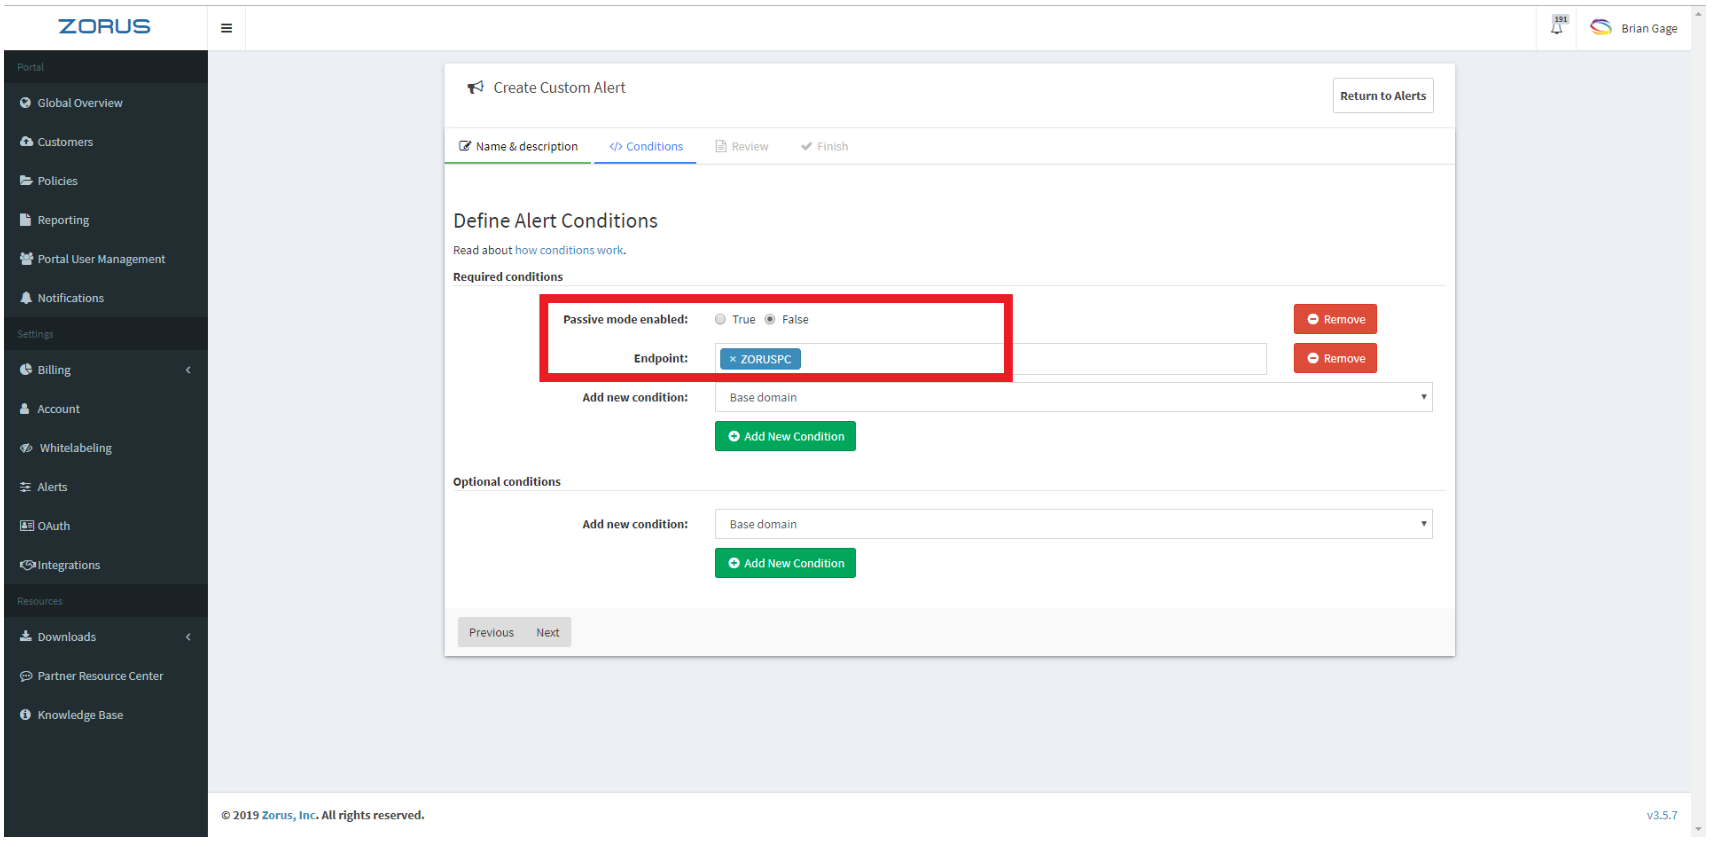
Don't Example: Passive mode alert as a required condition with optional conditions that they attempted to access an adult site.
This alert example will trigger any request or response made with passive mode disabled. This alert will also probably trigger way more often than you'd like.
Conditions
Base Domain: This is the base-level domain such as facebook.com. This will include any and all subdomains for facebook.com.
Category: These are the categories as defined in the Category Access section of our policies page.
Client IP (external): The IP address as it appears on the open Internet. This is typically the IP of a NAT gateway for IPv4 hosts.
Endpoint: This refers to the Endpoints deployed on the customer.
Filter State: This refers to the status of the log entry (Allow, SSL Bypass, Block, etc.).
Full Domain Name: This is the full domain name such as www.google.com.
Group: This refers to a specific group of the customer and will apply to all endpoints within that group.
HTTP Method: The type of request of a log entry (GET, POST, DELETE, etc.).
HTTP Response Size: The size in bytes of the response.
Log Entry Represents a Response: This log entry was not directly initiated by the user and represents a response being transmitted back to the client.
Passive Mode Enabled: This alert refers to any traffic made while in Passive Mode.
Remote IP: This refers to any traffic log entry to/from the remote IP address.
Request Initiated with AJAX: This represents any requests initiated via AJAX (Asynchronous Javascript and XML).