- The Windows Agent can be installed on Windows 7, 8, 8.1, Windows 10, & Windows 11
Install: XML Install Script
Uninstall: XML Uninstall Script
Step 1. Import the Script/Create EDF
- Download the XML file for the script.
- In the Automate Control Center:
- Click System > General > Import > XML Expansion
- Locate the XML file and choose "Open"
- This will create a script in Automate named Zorus Agent Install - Powershell
- Create EDF:
- Click System > Configuration > Dashboard
- In the Dashboard, Go to the Config Tab > Configurations tab > Additional Field Tabs
- Create the Second EDF:
- Name: Install Zorus
- Field Type: Checkbox
- Tab: Zorus
- Data Screen: Location
- The script will create the required token EDF at the Client level.
Step 2. (optional) Create the Search
We will want a deployment group, and the best way to manage that is with an Autojoin Search.
In the Automate Control Center:
- Click Automation > Advanced Searches
- Structure the Search like this (you can add another "Not And" group if there are any conditions you want to exclude):

- Enter a Name for the search and click Save
- Example: "Customer Searches\Zorus Deployment" will store the search in a folder named Custom Searches with the name Zorus Deployment.
Step 3. (optional) Now we create the Group for deployment.
In the Automate Control Center:
- Click Browse > Groups
- Create a new Group
- Name the Group (Ex: Zorus Deployment)
- Set the group to a greyed master (click the master group checkbox twice)
- In the Autojoin Searches section, set Computers to the Search you created in the previous step
- Click "Create"
- Click the Computers tab, then the sub-tab "Scheduled Scripts"
- Set the script dropdown to the Script we imported
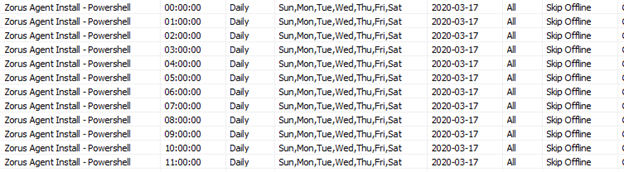
- Set your preferred schedule (Picture example runs every hour on the hour):
Step 4. Set Clients/Locations to deploy
Now that automated deployment is set up, clients can be configured for deployment. In the Automate Control Center:
- Open the Client Data Screen for the client you want to deploy to
- Click the Info Tab > Onboarding/Zorus
- Enter your Zorus Deployment Token in the data field
- Click "Save Additional Information" field (top left, not bottom right)
- Close the Client Data Center
- Open the Location Data Screen for the locations of the client you want to deploy to.
- Ex: If you have a separate location for servers and workstations, and only want to deploy to workstations, only open the workstation location.
- Click the Info Tab > Zorus Tab
- Check the box for Zorus Install
- Click "Save Additional Information"

Conclusion:
Following the above steps will make installation of Zorus at your clients/locations an Automate process and will only deploy where you want it. It will also future-proof the installation, as the script downloads the most recent installer for Zorus and the installation group will pick up any new computers added to the chosen locations and run the script on a schedule.