Explore a centralized repository of Zorus Reporting options for scheduling, including PDF and CSV Exports. Preview sample data before generating reports, ensuring a seamless process for accessing valuable insights. Enjoy one-stop access to various report types for convenient and proactive client advice

- Global Controls
- Use Quick Filters to easily find the Report type you want to run or schedule
- All - All available reports in the Library
- Filtering - reports that provide insights on DNS Filtering
- CyberSight - reports that provide usage analytics
- Account Indo - reports that pertains managing your Zorus account across Customers
- Search - globally search all Reports, inclusive of keywords in the description
- Use Quick Filters to easily find the Report type you want to run or schedule
- Reports
- Select a Report to display a preview with Sample Data - a description and quick filter is included in each
- Once selected, the Sample data will load and you will have the following options
- Go to Data - navigates you to the area in the Zorus Portal where that data lives / accessible for live feeds
- Run Now - run the report immediately
- Report Name - customize the name of the report for email / title page (defaults to name of Library template)
- Date - the date range you want report data return for
- Customer - select which Customer the report is for
- Endpoint - choose All Endpoints (default) or narrow it down to specific
- Include Title Page - include or exclude a White Labeled Title page
- Send to - input the email(s) to send the report

-
- Once run, a confirmation that it was received will look like this. You can then navigate to Report History or wait for the email notification

- Once run, a confirmation that it was received will look like this. You can then navigate to Report History or wait for the email notification
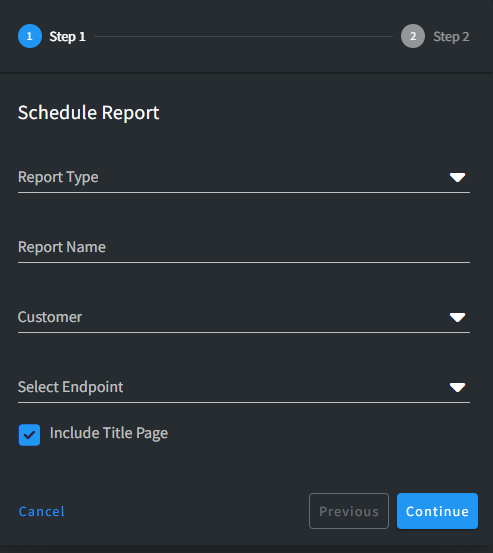
- Schedule - schedule the report for concurrent runs in a 2-step modal
- Report Type - choose which Library template report to run
- Report Name - customize the name of the report for email / title page
- Customer - select which Customer the report is for
- Endpoint - choose All Endpoints (default) or narrow it down to specific
- Include Title Page - include or exclude a White Labeled Title page
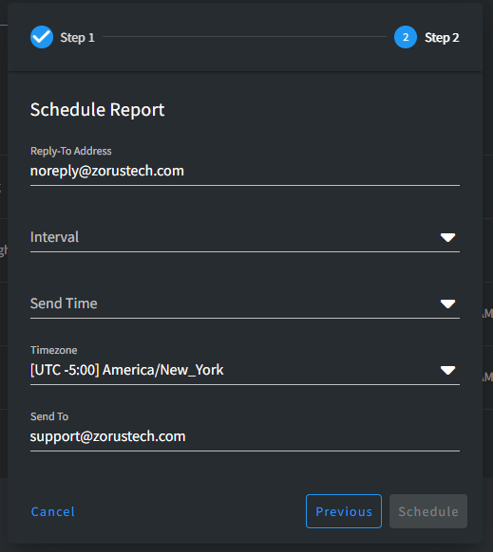
- Reply-To Address - customize who email replies are directed to
- Note: All reports are Sent From "no-reply@msp-reporting.com". This is not an option available to customer, but we can re-route email replies to any valid email address
- Interval - select the frequency to send the report
- Send Time - select the hour to send the report
- Timezone - select what time zone to adhere to
- Send to - input the email(s) to send the report
-