- The partner portal URL is portal.zorustech.com. We recommend using Google Chrome to access and edit your portal.
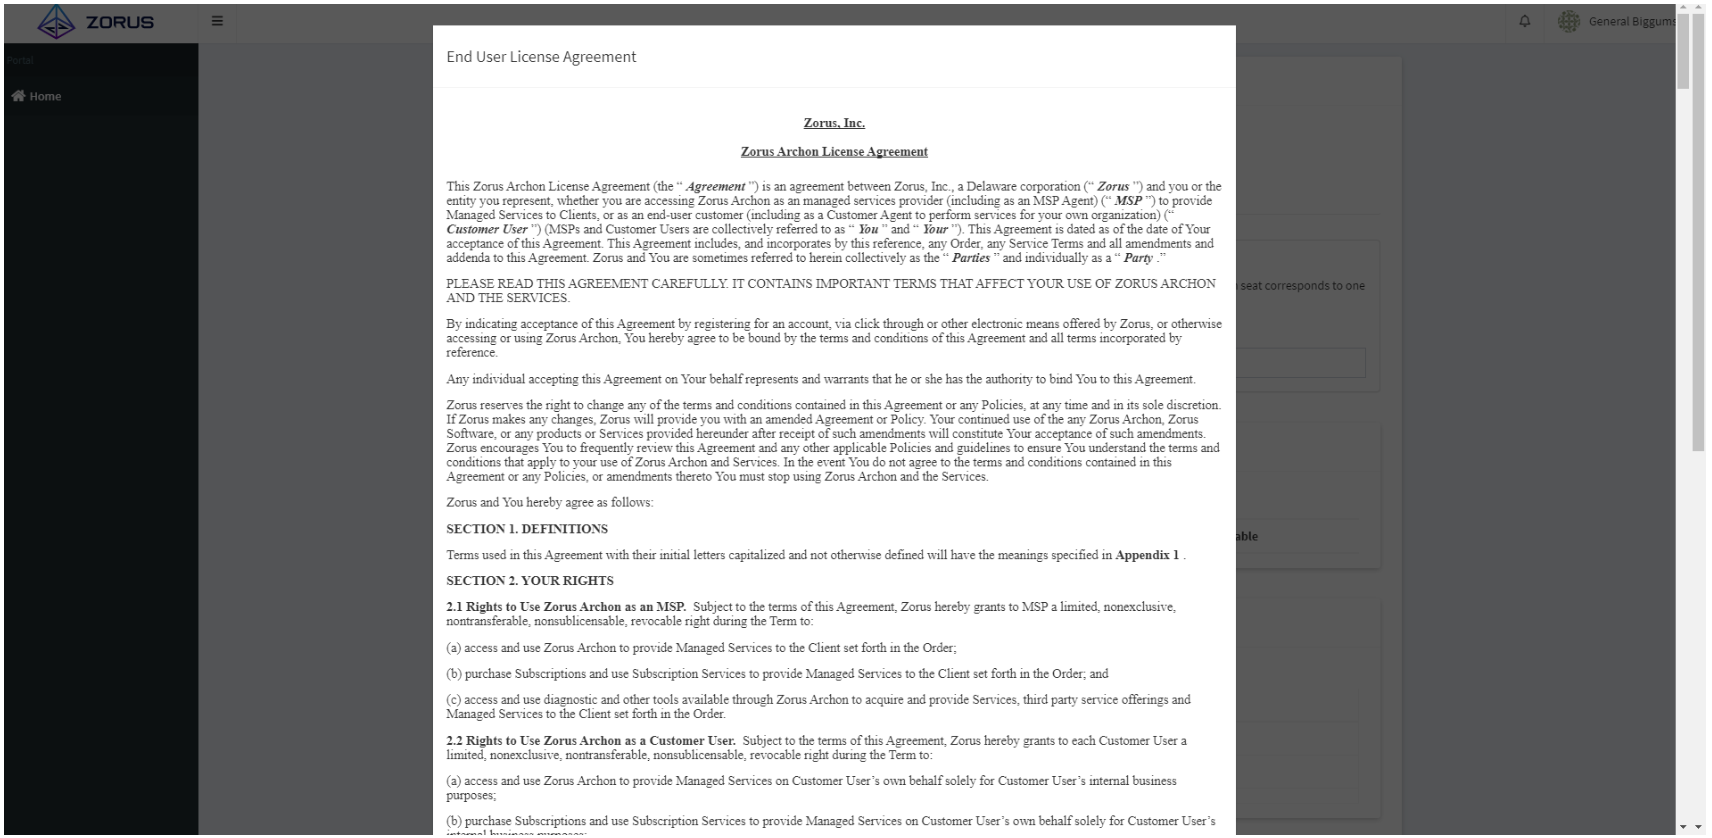
- EULA is available here: EULA Download
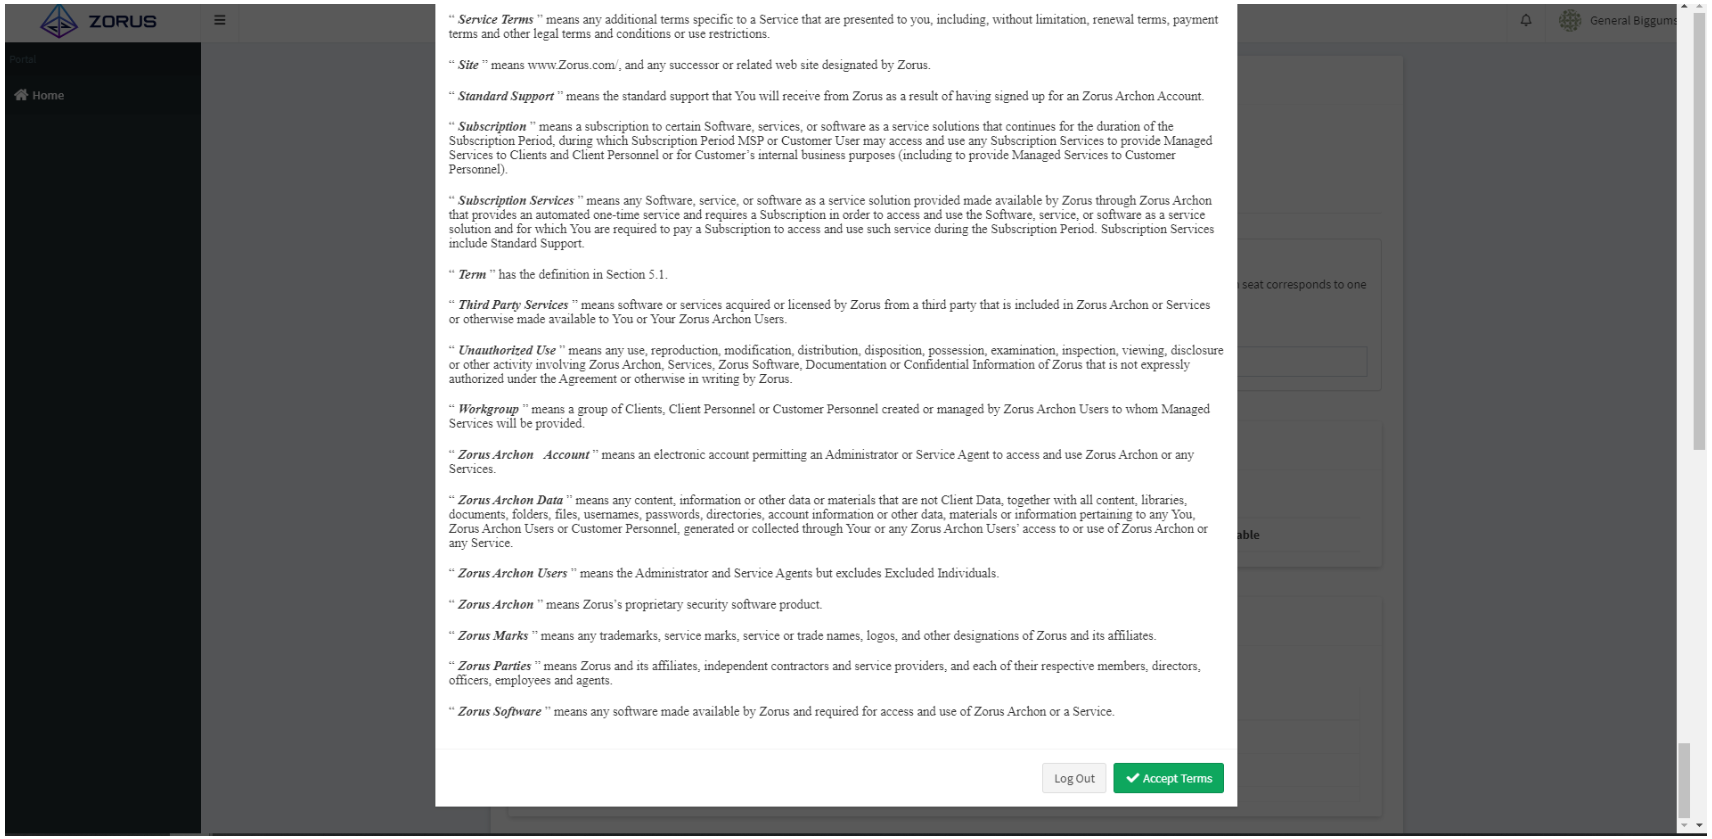
Step 1. Accept the EULA, please read through it in its entirety and scroll to the bottom, and click "Accept Terms".
Step 2. After you have accepted the EULA, you'll be able to choose how many licenses you'd like to purchase.

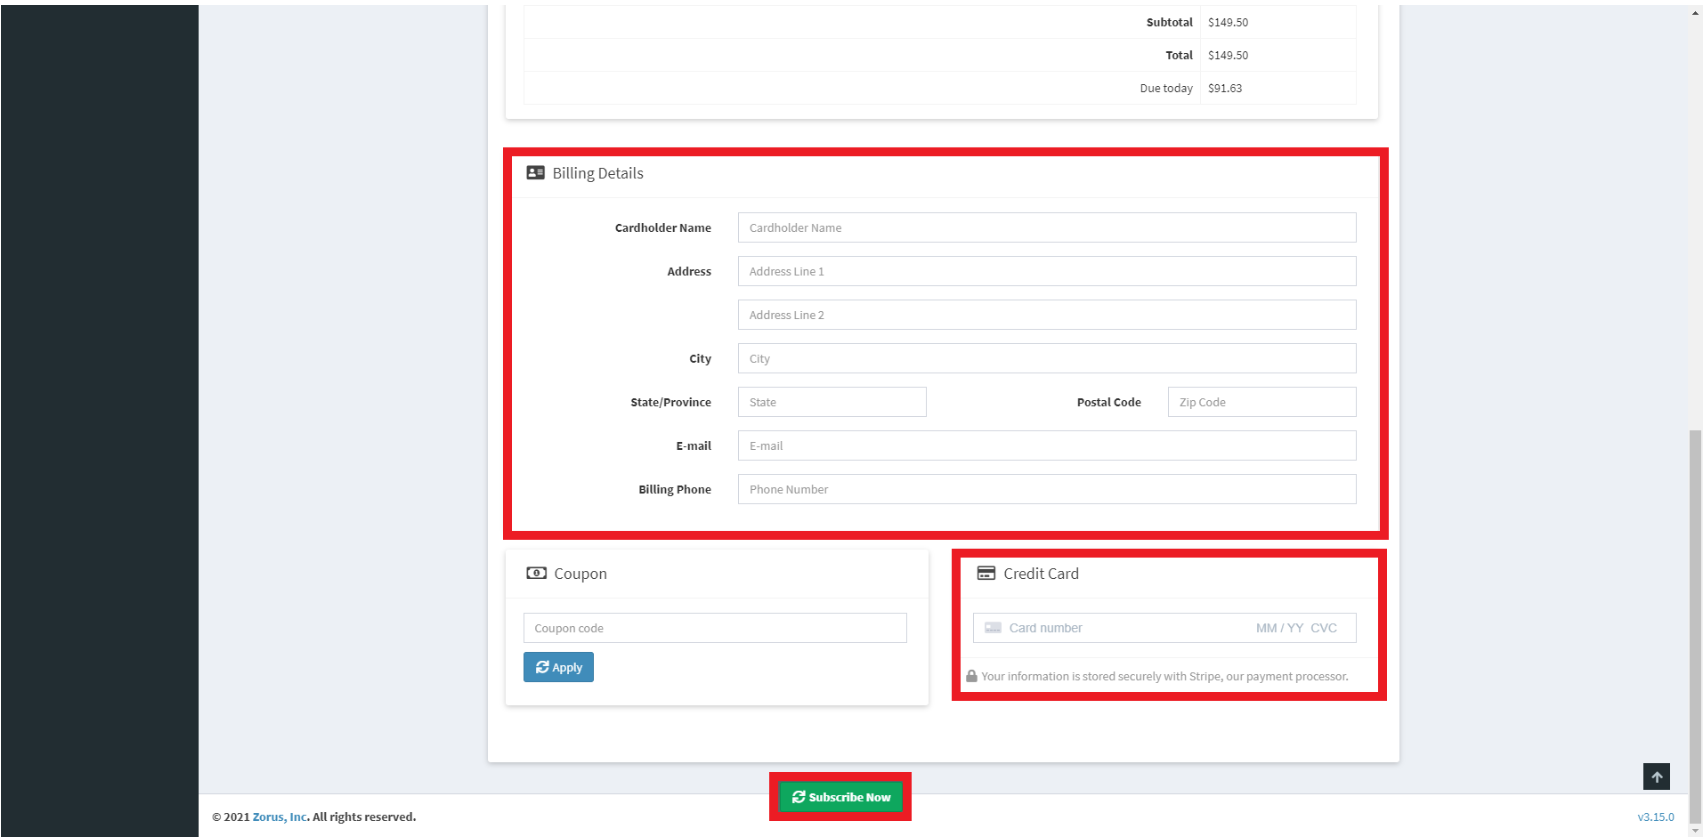
Step 3. Now you'll want to enter your billing details as well as credit card info. After completing that, click the "Subscribe Now" button and you'll be brought to the Customers page where you can create your first customer.
Step 4. Using the Customer Creation Wizard, follow the on-screen steps.

Enter the Customer name, and choose a policy you'd like to apply
- Share base policy checkbox will leave the policy name as is rather than renaming and duplicating it for that customer.

Seats can be purchased through your sales representative or you can click on Billing > Seat Management. After you have completed this step click on Create Customer.
This will lead you back to the main Customers page where you can then begin deployment to that newly created customer.
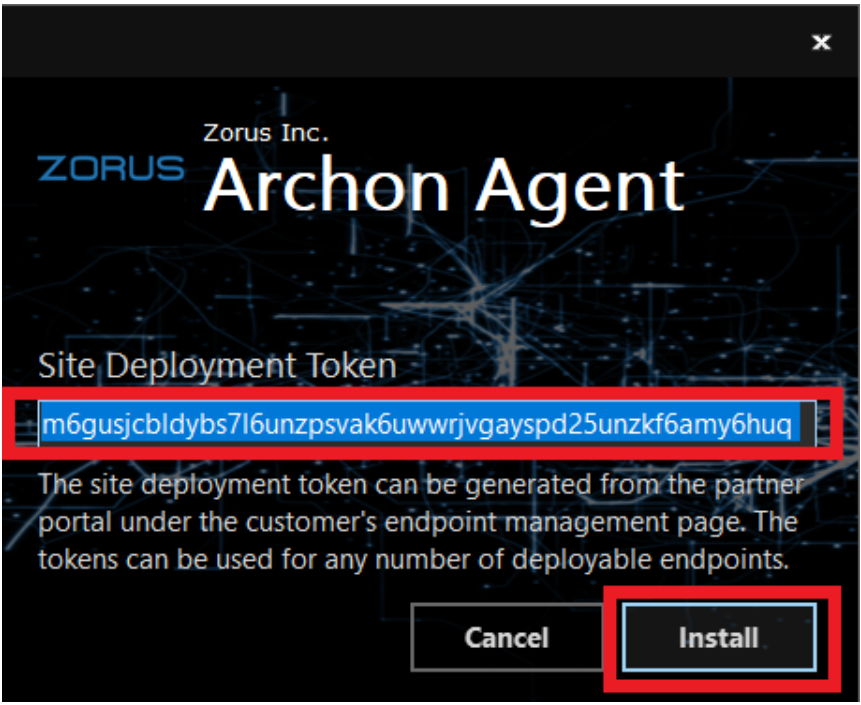
Step 5. Next, we will add endpoints to your Customer. Navigate to the Endpoints tab within your Customer. Once you're there, all you have to do is generate a token and enter that token during the installation of the Zorus Filtering agent.

*You can download and install the Filtering Agent from the Downloads tab of the Portal. For more detailed information on how to install the Filtering Agent Click here.
Step 6. Once you have added your endpoints we'll go ahead and add some groups. Groups are for separating different roles or departments in an office. For example, if you have a Sales team, a Support team, and a Marketing team, you may want to give different permissions and Content Filter policies to these departments. To add a group, click Add Group at the top right of the Groups box, name the group, and you will be able to apply Content Filter policies to these different Groups based on your needs or preferences.

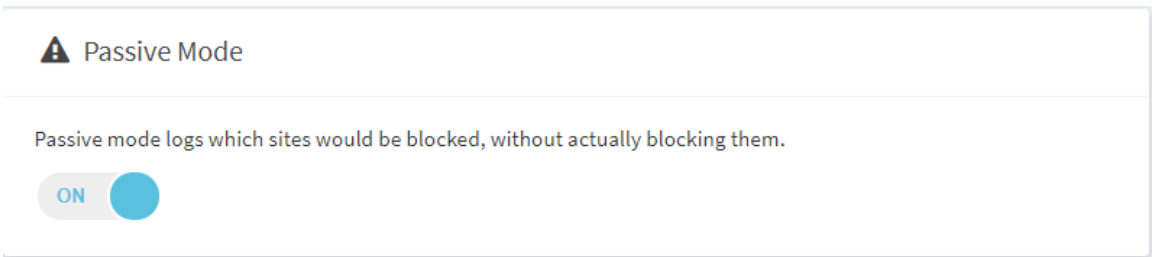
Before you begin this next step: We highly recommend that you start using your policy in Passive Mode. You can toggle Passive Mode by going to the Customer Settings tab and then clicking the "Misc" tab. Passive Mode will act as if the content filter policy is applied but won't block anything. This will allow you to tweak your policy while checking the Traffic Logs to see what is being blocked before making your policy go live. After you are satisfied with your policy simply toggle Passive Mode off.
Step 7. After you've added your groups you can head over to the Policies tab to start creating your policy. For a walkthrough of our Policy creation best practices, click here.

On the Policies page, you can edit Global Policy or the customer-specific policy after your customer was created. Select your policy you can then start setting up what things you want to be filtered. The first step would be our Category Access filtering. You can go through these different categories or use the search box to look for things that you want to Allow or Block.
The second area we will look at is our URL safelist and blocklist located within the Websites tab beside Category Access. Here, you can add specific URLs to these lists.

The next tab is Geolocation which refers to blocking or allowing traffic from countries you choose.

The next tab is settings which are some configurations such as enforcing SafeSearch, Block Unclassified Domains, and Risk Level Access, to name a few.

The final tab is Isolation which allows you to create a list of domains permitted to be accessed while a device is in isolation.

After you have gone through each one of the tabs you will have to click Save Policy.
Now that you have set up your Customer and Policy setup you are ready to start using Zorus Filtering and CyberSight!.